|
|
Post by Tenshu on Jan 6, 2010 2:05:09 GMT -4
Since I felt this didn't really belong in the same topic, I'll make a topic about the basics and touch on some techniques used in the Guilty Gear games that most of you are probably unfamiliar with. The command lists for each character are pretty understandable, it's made up of the familiar quarter circles, half circles, charge, etc. The attacks for all characters though aren't like conventional 2D fighters so here's a basic legend (the PC versions are ports of the PS2 version): P = Punch (by default, Square) K = Kick (by default, X) S = Slash (by default, Triangle) HS = Heavy Slash (by default, O) D = Dust (by default I believe R1) Most are probably familiar to you but Dust. Dust is a slow attack that when connected, will launch your opponent into the air similar to the launcher attacks in other fighting games. You may follow this up by hitting Up to follow them and make an air combo. Tension: The meter at the bottom of your character is called the Tension meter. It may look like the obvious Super Meter but it affects other aspects of the game. You build Tension with successful offensive attacks and moving forward, even dashing. However just as easily you can build Tension, you can lose it. Guilty Gear promotes offensive play so if you continuously avoid attacking or backdash a lot, a message will appear on your Tension bar, if you do not attack in a certain amount of time, you'll receive a Negative Penalty, which drains all the Tension you built up.
OffenseDust: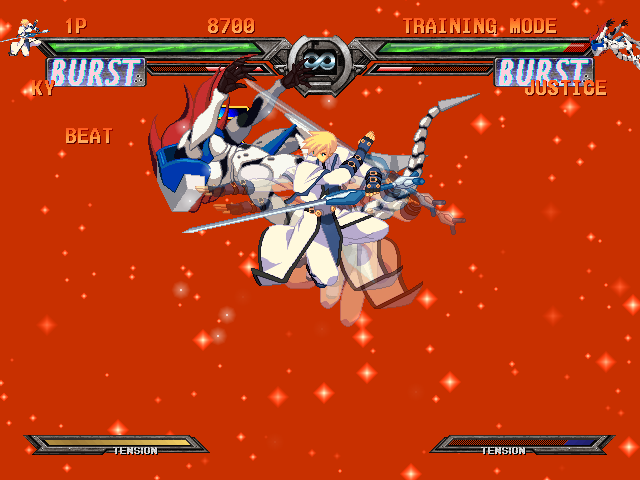 Like I explained earlier, Dust can be used as a launcher. However if you crouch and hit the Dust button, you'll do a sweep. In Guilty Gear you can still hit a downed opponent so sweeps can be handy in really building up combos and damage your enemy further. Each character has their own kind of attack when using Dust in the air, such as Ky leaving a temporary trap in the air or Chipp doing an attack many SSB fans may recognize as a "Meteor Smash" or a "Meteor Strike" lol. Knockback/Overhead: A knockback can be done by pressing Forward and the P button. They're good to use against an enemy trying to pressure since they have some invincibility at startup. An overhead strike is an attack that can hit a crouch-blocking opponent. Overdrives: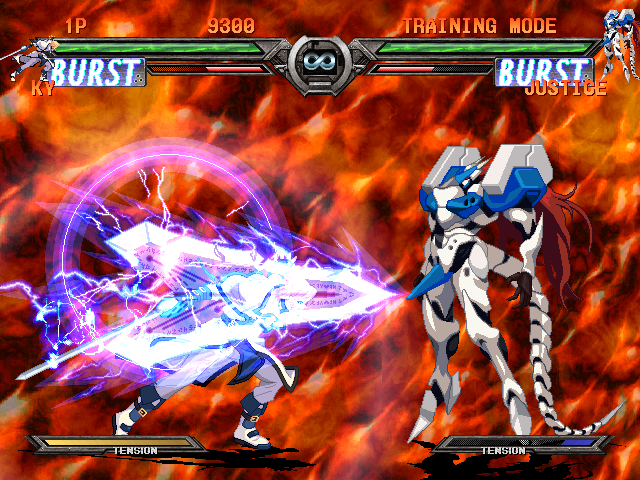 An Overdrive attack is the now standard Super Move fighting games have nowadays. On character command lists, these are in green.
DefenseBlocking: The primary way of defending yourself. Done by hitting back while standing, crouching, or airborne. Faultless Defense: 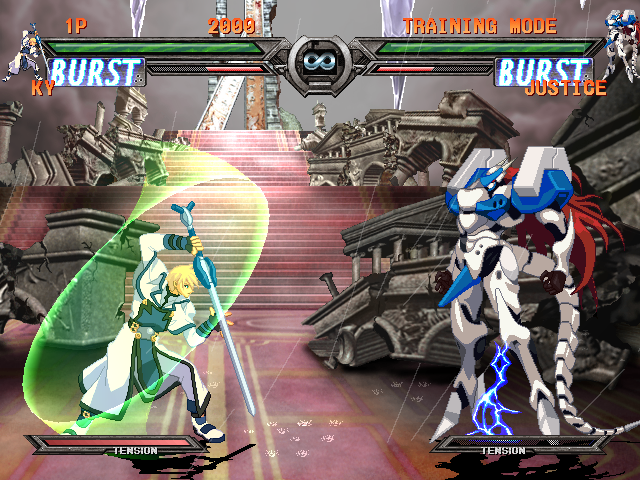 A secondary way to defend. It is done by holding back and hitting two attack buttons at the same time. A green sphere will surround your character and you will not receive any block damage from specials or overdrives. This does however consume Tension. Instant Block: Instant Block is like the Just Defense from Garou, in that if you block an attack the moment it hits you, your character will flash white and will recover from block stun faster than normal. Dead Angle: Dead Angle is a way to counterattack and it is done by hitting forward and two attack buttons after blocking an attack. This however consumed 50% of your Tension meter. Recover: A simple way to recover after being attacked is to hit an attack button while you're in the air after getting hit. Hitting towards or away will make you jump in that direction while recovering. You can't however Recover from regular attacks and certain attacks will not allow you to recover for a certain amount of time. Burst: Bursts are another kind of defense as well as offense. There are two types, both done in the same way by hitting the Dust button and an attack button at the same time. One kind is Yellow Burst which is offensive.  This is a burst that is done when you're neutral and if it connects with the enemy, you'll gain a full Tension meter, these bursts also do not leave you vulnerable to attacks after they are executed. The other kind of burst however is Blue Burst.  These Bursts are done while you're being attacked but they do not give you a grace period like Yellow bursts and it consumes 30% of your Tension gauge if it misses. Both bursts can only be done when the word BURST under your vitality gauge is blue and this gauge will refill with time. You also cannot Burst out of throws, overdrives, or when you're dizzy.
Destroyer: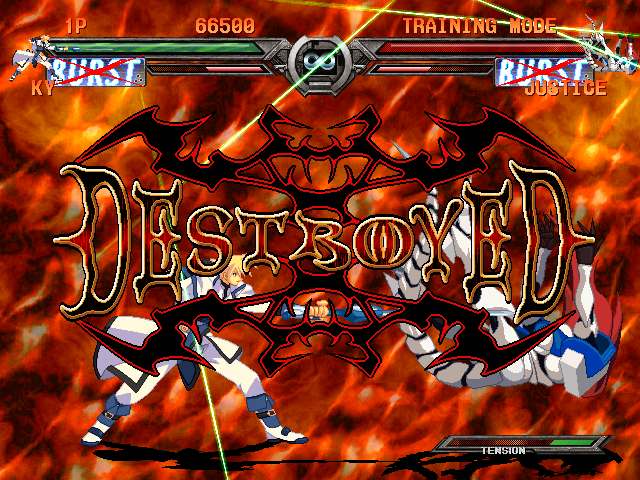 Destroyers are instant kill moves that each character can do by hitting all four attack buttons and the corresponding movement given in the command list. The Destroyer move is displayed in red. |
|
|
|
Post by Tenshu on Jan 6, 2010 2:23:58 GMT -4
Now I'll show you how to do the advanced techniques of Guilty Gear XX. Roman Cancel and False Roman Cancel:These are handy moves that can help any of you combo freaks and anyone who wants to be secure of their character's safety. What both these do is cancel the recovery of your attack. 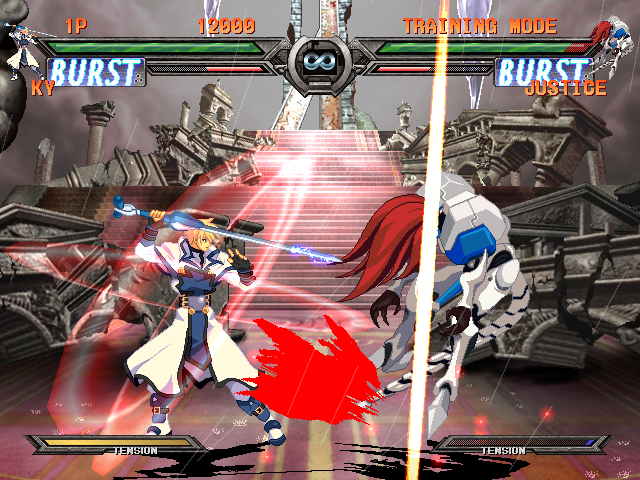 Roman Cancel consumes 50% of your Tension gauge and you'll know you did it successfully when your character has a red circle around them. 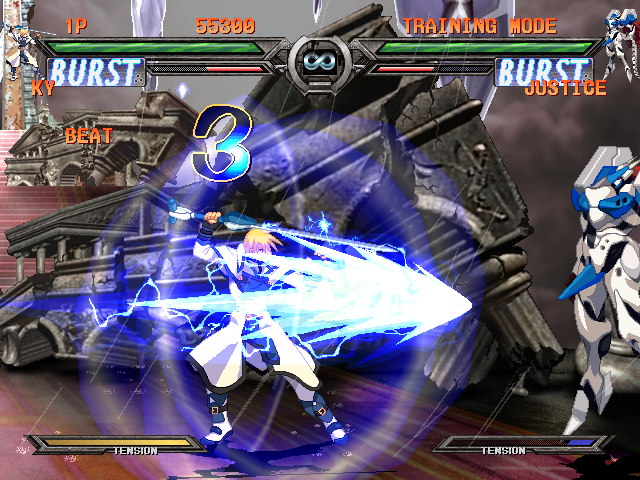 False Roman Cancel however only consumes 25% of your Tension gauge. However it can only be done on certain moves for your character and requires much stricter timing than Roman Cancel. Both are done by hitting three attack buttons together during the contact of the attack (Roman Cancel) or the 'sweetspot' of certain attacks (False Roman Cancel). Instant Air Dash: Everyone but Potemkin can do this. It's an air dash that can be done by simply jumping and Forward twice, or Away twice.   Dash Break: Dash Break: Dash break is used to halt the recovery time you have when your character normally dashes when standing. To do a dash break simply do a Faultless Defense to stop dead in your tracks to a defensive position. Alternatively you can also do a move for your character that corresponds with the forward button such as Sol's Volcanic Viper (Forward, Down, Down/Forward). Jumping: There are three kinds of jumps in this game. Regular jumps which are done by just hitting up. Double jumps which is done by jumping normally and hitting up again for a second jump. Finally, Super Jumps which is done by hitting Down then Up. |
|
|
|
Post by Tenshu on Jan 6, 2010 3:04:43 GMT -4
Now onto the individual characters For movements, refer to this legend: QCF/QCA = Quarter Circle Forward/Quarter Circle Away HCF/HCA = Half Circle Forward/Half Circle Away DPF/DPA = Dragon Punch Forward/Dragon Punch Away (named after the Dragon Punch in Street Fighter for the movement Forward, Down, Down/Forward) 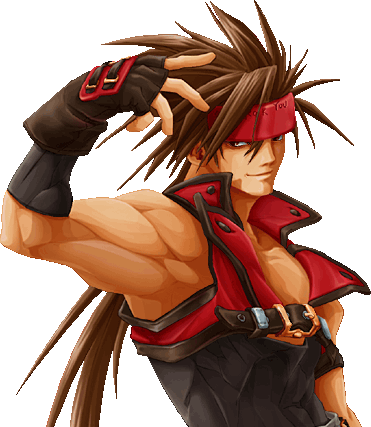 Sol Badguy Sol BadguyHeight: 184 cm Bloodtype: Unknown Weight: 74 kg Birthplace: America Birthday: Unknown Eye Color: Reddish Brown Likes: Listening to Queen After the death of Justice, the other Gears of the world lost their own free will and stopped their own movements. But rumors of a Gear that had a will of its own came to Sol. For this unknown Gear, was there despair, or...? Finally, at the Devil's Living Place, he met a girl that had been born with the power of a Gear. Despite his victory over her, for some reason he did not kill her, and left the forest. Gun Flame: QCF + P (This move can be False Roman Cancelled) False Gun Flame: QCA + P Volcanic Viper: DPF + HS (Can be done in the air and can be Roman Cancelled) - Volcanic Viper Kick: QCA + K during Volcanic Viper (Can be Roman Cancelled) Grand Viper: QCA + S (Can be Roman Cancelled) Bandit Revolver: QCF + K (Can be done in the air and be Roman Cancelled) Bandit Bringer: QCF + Hold K (Can be False Roman Cancelled) Riot Stamp: QCA + K (Can be False Roman Cancelled) Wild Throw: DPF + K Fefnir: HCF + HS (Can be False Roman Cancelled) Overdrives:Dragon Install: QCA x2 + S (Some of Sol's moves are changed and his attack and movement speed are increased) Tyrant Wave: HCA, Forward + HS (Can be Roman Cancelled) Quoted from IGN"Sol is a traditional character in the sense that newcomers to the series will find him one of the easier characters to get acquainted with. He has a nice projectile in the Gun Flame and a high priority uppercut with his Volcanic Viper. The False Gun Flame is a great alternative to the actual Gun Flame, especially at the end of a ground chain. Use the feint sporadically to position yourself to use Sol's Wild Throw, which is one of the many setups to the infamous corner loop combo. The corner loop combo basically requires you to get your opponent into the corner and then hit them with repeated air Dust attacks for major damage. The concept seems simple, but the execution can be tricky for a lot of players. First off, you actually need to get your opponent in a situation where they're in the air but they cannot Recover. This can be done with Sol's regular throw or Sol's Wild Throw. The next step is to throw in an attack that will allow you to super jump cancel so you can follow your opponent. An attack like Down + HS does the trick here, since it pops up your opponent slightly and gives you the ability to jump cancel. Now that you're in the air, you can start smacking someone around with your Dust attacks. You'll be able to throw in two air Dust attacks per super jump before you land. You must then super jump immediately after landing and hit them with an air Dust attack while ascending from your jump and then again while descending. With just three repetitions of the corner loop combo, you can easily take off 50% of your opponent's lifebar. The difficulty with the corner loop combo lies in actually getting your opponent to your corner. Most matches will not always end up in the corner, but rather in the middle of the stage. The best (and most difficult) setup for the corner loop combos is the Gun Flame False Roman Cancelled to a throw. The timing to FRC a Gun Flame is extremely tight (1 frame to be exact), but the rewards can be very high if you're able to pull it off. Sol's corner loop combo is a great addition to anyone's arsenal, but it's not for everyone, especially for those who just can't get the timing down. While the majority of the top GGX2 players do use the corner loop combo you can easily win without it, but it comes at a larger cost because of the Tension you'll have to use. The Grand Viper is a good move for players of all levels to use, since it's one of the few rushing moves that hits low and can be Roman Cancelled before you leave the ground. The Bandit Bringer is a new move for Sol in GGX2 and can setup his new Tyrant Wave Overdrive quite nicely. As for Sol's Dragon Install Overdrive, it may seem like a nice move, but the damage it does for the risk involved (Sol is dazed for a long period of time after it wears off) makes it something to use just for showing off. Save your Tension for either the Tyrant Wave or for Roman Cancelling." |
|
|
|
Post by Tenshu on Jan 6, 2010 3:54:59 GMT -4
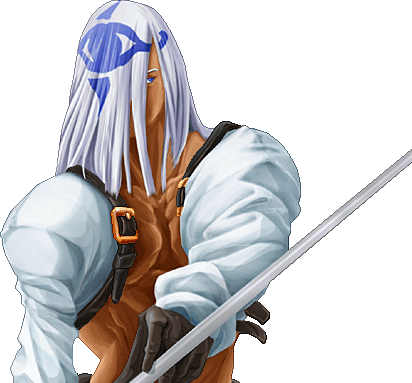
 Ky Kiske Ky KiskeHeight: 178 cm Bloodtype: AB Weight: 58 kg Birthplace: France Birthday: November 20th Eye Color: Blue-green Likes: Teacup Collection From the message of Justice at the last tournament, he learned that his own definition of justice was limited to humans. With his philosophy of "Gears are Evil", he could neither throw it away nor keep completely, and began looking for the truth. Then, he heard about a Gear that had no intention of hurting humans. Now, in order to search for his own "justice", he takes the Fuuraiken in hand once again. Stun Edge: QCF + S (Can be done in the air) Charged Stun Edge: QCF + HS (Can be done in the air and False Roman Cancelled) Vapor Thrust: DPF + S or HS (Can be done in the air and be Roman Cancelled) Stun Dipper: QCF + K (Can be False Roman Cancelled) Greed Sever: QCA + K (Can be Roman Cancelled) Overdrives:Ride the Lightning: HCA, Forward + HS Sacred Edge: QCF x2 + P (Can be False Roman Cancelled) Quoted from IGN:"If you're looking for a more traditional character in the vein of Ryu and Ken from Street Fighter, Ky is the man you want to choose. He has the traditional moveset of a projectile with an uppercut, and can do some serious damage with both. The Slash version of the Vapor Thrust is probably the best out of the two versions since it's easier to combo with when you're attacking with ground strings, and it leaves you slightly less vulnerable if you use it as an anti-air attack. Ky's two projectiles both have their purposes; the regular Stun Edge is a great way to keep the pressure on your opponent, and it's a much better projectile in the air since it comes out very fast. The Stun Edge Charge is great because you can FRC it and then follow it with an Instant Air Dash. By doing this, you'll actually end up inside the projectile, giving you a safety net to work with when you're rushing an opponent. The two new moves that Ky has received are the Greed Sever and the Sacred Edge Overdrive. The Greed Sever is a sort of slow, overhead swing that actually works quite well at the end of some ground chains. If your opponent is inexperienced, then you can catch him/her sleeping if he's blocking low, as the Greed Sever will hit him. It also works well as a pre-emptive attack for air attacks. If you're having trouble with players who love to dash in the air and attack, then the Greed Sever can come in mighty handy to shut them down. The Sacred Edge Overdrive is his new projectile attack, and it's definitely his best Overdrive. Sacred Edge leaves your opponent in a good position for a followup, especially if they're trapped in a corner. If this is the situation, you don't even need to FRC the Sacred Edge to tack on extra attacks. However, if they're not in the corner, you'll need to FRC before you can do anything. Good followups to the Sacred Edge are S => Stun Dipper or S => Stun Edge. Ky's standing S attack has just enough range that if you are able to FRC the Sacred Edge, you won't need to move forward in order to hit with a standing S." |
|
|
|
Post by Tenshu on Jan 6, 2010 4:31:44 GMT -4
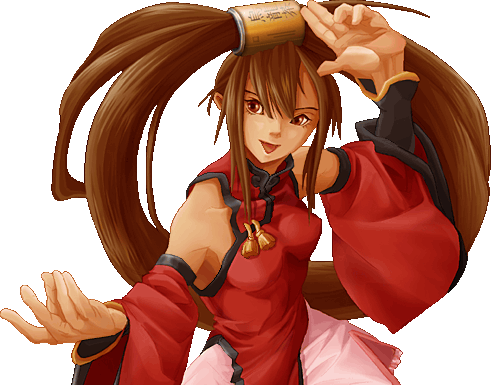 Jam Kuradoberi Jam KuradoberiHeight: 163 cm Bloodtype: B Weight: Unknown Birthplace: China Birthday: February 8th Eye Color: Brown Likes: Cooking, Watching, and Research Important Things: Kitchen, Youth, and Beautiful Boys Dislikes: Indecisive Men, Ignorance "Kiyuumaro" and "Hanagata". Every cook aspired to be able to work for these two restaurants, but neither interested Jam. To her, each of their policies were nonsense. The most important thing was to create good-tasting food for everybody, and "process" taught by these restaurants was inadequate. She resolved to create her own restaurant and aimed for the bounty. After Dizzy's departure, she reports that she took care of it and received the money for herself. Thus, she was able to get her dream fulfilled. Hochifu: Away, Forward as opponent attacks (Deflects High and Mid Attacks) Breath of Asanagi: Down, Down + K, S, or HS (Increases power to Ryujin, Gekirin, and Kenroukaku) Ryujin: QCF + K (Can be done in the air and Roman Cancelled) Gekirin: QCA + K (Can be done in the air and Roman Cancelled) Kenroukaku: DPF + K (Can be done in the air and Roman Cancelled) Bakushu: QCF + S (Dodges attacks) - Mawarikomi: P during Bakushu (Dodges attacks) - Ashibarai: K during Bakushu (Can be Roman Cancelled) - Hyappo Shinshou: S during Bakushu (Can be Roman Cancelled) - Senri Shinshou: HS during Bakushu (Can be Roman Cancelled and can dodge attacks) Houeikyaku: Down + K in the air Overdrives:Chokyaku Houoshou: HCA, Forward + S (Can be Roman Cancelled) Renhoukyaku: HCA, Forward + HS Geki Saishinshou: QCF x2 + HS (Can be Roman Cancelled) Quoted from IGN:"Jam's kick specials are her best means of doing damage to any opponent, and you can actually combo them together for some good damage. Start off with Jam's Ryujin, then combo that into Kenroukaku and then into Gekirin. It does even more damage if you're able to powerup Jam's kicks with her Breath of Asanagi. However, you can't combo two of the same kicks consecutively, even though they can be used in the same combo (Ryujin, Gekirin, Ryujin but not Ryujin, Ryujin, Gekirin). Her best normal attacks are her far standing S and crouching H, both of which do good damage and are useful for outpoking your opponent. Crouching HS is especially useful because it hits twice, making it far easier to combo into Ryujin/Gekirin/Kenroukaku than other attacks. Her Dust attack is also very good, not only because it's pretty fast, but because it has a subtle animation that actually looks like her parry. Once your opponent has been Dusted, followup with HS x 4, then Kenroukaku, Gekirin and Ryujin comboed into each other. Another setup that you want to keep in mind is to power up Jam's kicks as much as possible. You can powerup each kick up to three times, but doing so in the heat of battle is hard. The best way to use Breath of Asanagi is to sweep your opponent or hit them with an attack they can't tech hit out of (like one of Jam's Overdrives) and then quickly use Breath of Asanagi to powerup a kick. Jam players will want to use this powerup as much as possible, because it greatly increases the damage that you can do with the little lady. Because of Jam's rushdown nature, she's one of the main characters that benefits greatly from advanced techniques such as Instant Air Dash. She can jump cancel her standing S or standing P, which allows her to jump into the air for an Instant Air Dash into any move, preferably a kick special or her dive kick (Down + K while in the air). However this obviously a hard technique to master. You'd have to practice a lot before you can do this consistently, much less throw in an additional attack after the IAD. When you start implementing IAD into Jam's arsenal, start off with trying to jump cancel her standing S instead of the standing P because it's slightly slower, giving you more time to add in the jump and the IAD afterwards." |
|
|
|
Post by Tenshu on Jan 6, 2010 6:27:07 GMT -4
 Venom VenomHeight: 179 cm Bloodtype: A Weight: 66 kg Birthplace: England Birthday: Orphaned so unknown Eye Color: Blue Likes: Reading, Chess After Zato's escape from the Dimensional Prison, no one knew what became of him. No one knew if he had been imprisoned, or if he were even still alive. Rumors that he had died or that he had given up his position spread through the Organization. There, Venom, who had long been by Zato's side, did not believe anything. Learning about a possible location for Zato, he set forth. At the end of his journey, he realized Zato's death. Stinger Aim: Charge Away, then Forward + HS (Can be False Roman Cancelled) Carcass Raid: Charge Down, then Up + HS Ball Formation: QCA + P, K, S, HS Dubious Curve: DPA + P, K, S, HS (Can be Roman Cancelled) Double Head Morbid: DPF + S or HS (Can be Roman Cancelled) Warp: DPF + K Mad Struggle: QCF + S or HS (Air) Overdrives:Dark Angel: QCA, HCF + S Red Hail: QCF x2 + HS (Air) Quoted from IGN:Venom's strengths lie in his ability to setup his lockdown traps while rushing his opponent, and is arguably one of the best characters in the game simply because he can lock you down in a corner and rush you at the same time. This is all due in part to his abillity to summon pool balls. There are a few things you need to know about Venom's ball formations if you want to use them effectively. First off, the attack that you hit a ball with will determine its speed and its trajectory. If you hit a ball with a punch, it will travel slow, whereas hitting it with a dust attack or H will make it go faster. Also, if you hit a ball at an angle, it will follow that trajectory. For example, Venom's jumping S is a downward hitting move, so if you hit a ball with that attack, it will travel downwards. Secondly, the balls themselves can riccochet off each other, including the balls fired from Stinger Aim and Carcass Raid. This presents an interesting scenario because you can literally have balls flying in all directions, which makes it very hard for your opponent to break through. Venom also has the ability to combo into his Ball Formation and his Dubious Curve setups, both of which place a single pool ball onto the screen. You can have a maximum of four pool balls on the screen at once, and they change formation depending on which button you used to summon the first pool ball. Basic setups for the balls involve summoning them at the end of strings and after knockdowns. Combo'ing them into strings can be tricky because you're obviously vulnerable if you use Ball Formation, but you can make your opponents respect your strings by using Dubious Curve or Double Head Morbid. Mix these moves up with the Ball Formation so that if your opponent has thoughts of attacking you when they think you might summon a ball, you can punish them. Knocking down your opponent with a sweep is a much better (and safer) option here. Knock them down with Down + D and then summon a P ball, which will appear right over them. Hit the ball with a basic standing P just as they're getting up, and then use Mad Struggle from the air. This works because of the buffer window that the game provides, and is a useful tool in wakeup games. You can also use Venom's Warp instead of Mad Struggle. Good followups in the wakeup game include Mad Struggle, Throwing and Carcass Raid. Having said all of that, it should be clear that no Venom player is worth his weight in gold without all the fancy ball formations. Ball formations and how you summon them are extremely important for not only locking down your opponent, but to keep away characters like Chipp and Millia who have an extremely easy time getting through because of their speed. |
|
|
|
Post by Tenshu on Jan 6, 2010 7:53:15 GMT -4
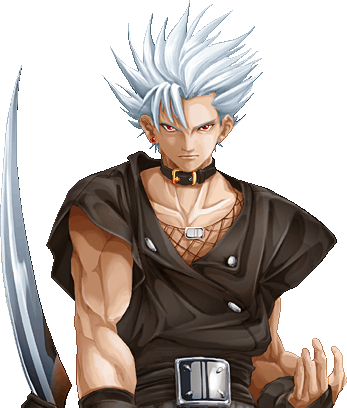 Chipp Zanuff Chipp ZanuffHeight: 183 cm Blood Type: B Weight: 67 kg Birthplace: Insists that it's Japan (actually America) Birthday: February 9th Eye Color: Red Likes: Dreaming Unable to win the last tournament, Chipp became aware again of his own weaknesses, and set out to train once again. Witnessing the death of Justice, he realized that despite his murderous actions, he was searching for someone to save him. Chipp searches for that "saving hand". Now, hearing about a Gear that does not hurt others, Chipp set forth to find her. Alpha Blade: QCF + P (Can be done in the air and be Roman Cancelled) - Alpha Plus: HS after Alpha Blade (Cannot be done if Alpha Blade was done in the air and be Roman Cancelled) Beta Blade: DPF + S (Can be done in the air and can be Roman Cancelled) Gamma Blade: HCF + HS Tsuyoshi-Shiki Teni: Down, Down + P, K, S, HS (Teleport) Tsuyoshi-Shiki Meisai: QCA + K (Makes Chipp Invisible) Genrou Zan: HCF + K (Throw. Can be False Roman Cancelled) Resshou: QCF + S (Can be Roman Cancelled) - Rokusai: QCF + S during Resshou (Can be Roman Cancelled) - Senshu: QCF + K during Resshou or Rokusai (Can be Roman Cancelled) Jackhammer Kick: Down + K (During jump) Shuriken: Respect (Taunt) in the air. Overdrives:Zansei Rouga: HCA, Forward + S (Can be Roman Cancelled) Banki Messai: QCF x2 + K (Can be Roman Cancelled) Quoted from IGN:When it comes to pure, unadulterated speed, Chipp is the man to turn to in GGX2. Possessing the quickest attacks and quickest foot speed, Chipp is perfect for those who love to rush their opponents down. However, this speed comes at a price because Chipp has very poor stamina and can't take damage all too well. Despite his lack of stamina, Chipp has a lot of tools at his disposal. He can avoid a lot of traps and lockdowns via his teleport, which can be used to warp to four different locations on the screen, his Gamma Blade has been modified from GGX so that it actually traps your opponent and allows you to score a free hit. Because it is relatively slow compared to other projectiles, the Gamma Blade is best used after a successful sweep. By linking Down + D into Gamma Blade you can guarantee yourself a couple of free hits. Chipp's main weapon is in the form of his Resshou series. Fully cancellable at all three parts, the Resshou series allows Chipp to deal some decent damage if the attack is successful and a potential free throw if it is blocked. A good tactic to use with the Resshou/Rokusai series is to Roman Cancel it and then buffer in Chipp's Genrou Zan. Most players will stand still and anticipate the second or third part of the series and eat the throw easily. You can score an additional two hits off the throw with an S, H gatling combo. As far as his Overdrives go, the most useful one is the Zansei Rouga for damage, and the Banki Messai for guard meter. However, Chipp's Tension is better used for cancelling his many moves. |
|
|
|
Post by Tenshu on Jan 6, 2010 19:30:57 GMT -4
 Axl Low Axl LowHeight: 179 cm Blood Type: B Weight: 78 km Birthplace: England Birthday: December 25th Eye Color: Blue Likes: Billiards Even at the conclusion of the last tournament, Axl couldn't return to his own time period, and was lost in a different age. And then one year later, Axl found himself experiencing the same events again (although from his point of view, this was three years later.) However, he did gain something from his travels. Hearing about a man with the same time travelling ability as him... "The Man", Axl wondered if he could learn how to return to his own time period from him. Recognizing the scent of "The Man" on the previous tournaments, Axl sets forth again. Benten Gari L: DPF + S (Can be Roman Cancelled) Benten Gari H: DPF + HS (Can be Roman Cancelled) - Axl Bomber: DPF + HS after Benten Gari H (Can be Roman Cancelled) Rensen Geki: Charge Away, Forward + S (Can be False Roman Cancelled) - Kyokusa Geki: Jump during Rensen Geki - Sensa Geki: Crouch during Rensen Geki (Can be Roman Cancelled) Rasho Sen: Charge Away, Forward + HS Tenhou Seki #1: QCA + P (High/Mid Reversal) Tenhou Seki #2: QCA + K (Low Reversal) Hachisubako: DPF + P (Special Attack Reversal. Can be Roman Cancelled) Raiei Sageki V: HCA + S (Can be Roman Cancelled) Raiei Sageki H: HCA + HS (Can be False Roman Cancelled) Axl Bomber (Single): DPF + HS (In air. Can be Roman Cancelled) Overdrives:Shiranami no Homura: QCA + S during Hachisubako (Can be Roman Cancelled) Hyakue Renshou: QCF, HCA + HS (Can be Roman Cancelled) Quoted from IGN:"Because of Axl's long range with his chains, he's best played as a mid-range character (his optimal range being 1 - 2 character widths away from his opponent) with small amounts of rushdown for additional damage. His best attack is his Rensen Geki, and it's even more powerful when you FRC the move, although the timing on it is very difficult. Rasho Sen should also be a vital part of your arsenal. It's a flashly move, but it also has some technical crouch properties which allow you to duck high level attacks. A common tactic with Axl (and with any other character that possess reversals) is to go into your Gatling combo and tack on a reversal at the end of it. By using a combo such as S, HS, Hachisubako you can catch eager players off guard when they try to retaliate. Force them into a habit of seeing your S, HS Gatling combo and then block whatever they retaliate with. Most players will be baited into thinking they can attack safely if you don't use the Hachisubako immediately, and then you can nail them with the reversal and a super (if you have the Tension for it) when you do pull it off. The Overdrive after a successful Hachisubako is especially great because if you are able to hit it properly, your opponent will be bounced high into the air and is open for a combo. Take advantage of this by nailing them with an air combo of your choice." |
|
|
|
Post by Tenshu on Jan 6, 2010 19:55:41 GMT -4
 Potemkin PotemkinHeight: 245 cm Bloodtype: O Weight: 656 kg Birthplace: Floating Continent Zepp Birthday: October 18th Eye Color: White Likes: Drawing Important Things: Pencil box that won't break even if trampled by a dragon Dislikes: Pencils that can't stand 4 tons of pressure Story: With the change of his country's government and his own freedom, both Potemkin and his government enjoyed a sense of peace. Then, one day President Gabriel, his former mentor, sent him a secret order. His command was to take the Gear back to Zepp, away from the bounty hunters. However, before he made contact, the Gear had already found her own place. Potemkin imitated Gabriel's stoicism on the matter. Mega Fist #1: QCF + P (Can be False Roman Cancelled) Mega Fist #2: QCA + P (Can be False Roman Cancelled) Sliding Head: QCF + S (Can be Roman Cancelled) Hammer Fall: Charge Away, Forward + HS (Can be False Roman Cancelled) - Break: P during Hammer Fall F.D.B: HCA + S (Can be Roman Cancelled) Potemkin Buster: HCA, Forward + P (Throw) Heat Knuckle: DPF + HS (Can be Roman Cancelled. Only works on airborne opponents) - Extend: HCA + HS during Heat Knuckle (Can be Roman Cancelled) Overdrives:Giganter: HCA, Forward + HS Gigantic Bullet: HCF x2 + P (Can be Roman Cancelled) Heavenly Potemkin Buster: QCF x2 + S (Only on airborne opponents) Quoted from IGN:"Potemkin is the big juggernaut of Guilty Gear X2, and that shows in the fact that he can't dash at all. He's just one lumbering fool that can probably take off 50% of your life in one easy combo. Because of Potemkin's sloth-like movement, you need to use everything in your arsenal to overcome lockdown experts like Venom and Faust as well as the rushdown characters like Millia. Fortunately Potemkin has tools he can use in just about every situation. The Hammer Fall is a great tool to use in combos, whether or not they are blocked. If it hits then it takes off a significant amount of life, and if it is blocked it does a ton of guard damage. You can also Roman Cancel the Hammer Fall so that it sets yourself up for the Potemkin Buster. Mega Fists are actually quite good in moving yourself around the stage, since Potemkin's foot speed leaves much to be desired. It also counts as an overhead so crouching opponents will get hit. His two best moves are the Potemkin Buster and the Heat Knuckle. As an anti-air, the Heat Knuckle has no equal. It does a ton of damage and has a followup you can tack on for even more damage. By Roman Cancelling the Heat Extend, you can also follow up with the Heavenly Potemkin Buster for over 50% of your opponent's lifebar, and it's not even a hard combo to pull off! The Potemkin Buster is a throw, and it does a hell of a lot of damage. Best of all, it can be combo'd into with Down + K! You can bet that good players will be baiting people with the Down + K in hopes of landing a guaranteed Potemkin Buster. In any area on the stage except for the corner, the best followup for a Potemkin Buster is probably a Mega Fist or standing S. In the corner is where things get really nasty with the Potemkin Buster. Because your opponent won't be tossed a great distance while in the corner, you can start pulling off some really nasty combos, such as Potemkin Buster, S, Down + HS, Heavenly Potemkin Buster or Potemkin Buster, S, Heat Knuckle, Extend, Roman Cancel, Heavenly Potemkin Buster. The possibilities are literally endless here!" |
|
|
|
Post by Tenshu on Jan 6, 2010 20:12:43 GMT -4
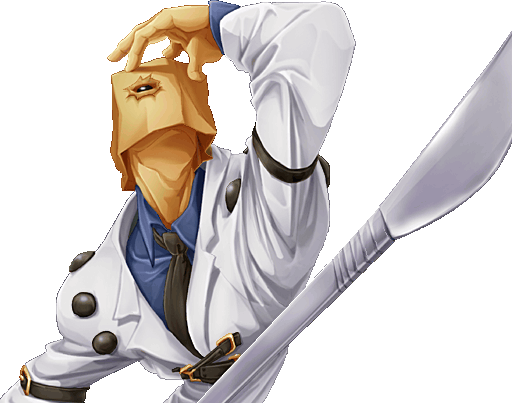 Faust FaustHeight: 282 cm Bloodtype: Unknown Weight: 55 kg Birthplace: Unknown Birthday: Unknown Eye Color: Glowing Likes: Unknown Important Things: Unknown Dislikes: Unknown After regaining his memory, he felt the weight of his sins, and decided to end his own life. However, for him "death" is not pain, but rather an "escape", as he continued his travels. Then one day, he learns that the death of the girl was not a result of his own mistake but a murder from some third party. Putting aside his own guilt, he resolved to save as many lives as he can. Rerer no Tsuki: HCF + K (Can be Roman Cancelled) - Pull: Away during Rerer no Tsuki - Hello!: QCF + P during Pull (Can be Roman Cancelled) - Speak Up!: QCF + P after Hello! - Hello Again!: QCF + P after Speak Up! (Can be Roman Cancelled) What's Next?: QCF + P (Random Item) Going My Way?: QCF + HS (In air. Can be Roman Cancelled) Love: QCF + P (In air. Can be False Roman Cancelled) Souten Enshin Rambu (SER): QCF + S (Can be False Roman Cancelled) - Going My Way?: H During SER (Can be False Roman Cancelled) - Forward/Backward: Forward x2 or Away x2 During SER (Forward can be Roman Cancelled) - Neck Periscope: P during SER (Can be Roman Cancelled) - Growing Flower: K (Can be Roman Cancelled) - See? I'm a Flower!: S during SER (Can be Roman Cancelled) - What's Next?: D during SER Shower Hack: QCA + HS (Throw. Can be Roman Cancelled) In Your Face!: QCA + P (Can be Roman Cancelled) Watch Your Back!: QCA + K (Can be Roman Cancelled) Look Out Below!: QCA + S (Can be Roman Cancelled) Overdrives:Super What's Next?!: QCF x2 + P (Four Random Items) Gamble Attack (The Ass Stab): QCF x2 + S (Opponent chooses with the four attack buttons) Quoted from IGN:"Faust is the man, and anyone who says otherwise is just fooling themselves. What makes him so powerful? He can toss one of four random items onto the screen with his What's Next? move, and not only can he do it from a standing position, he can also do it off the Souten Enshin Rambu. The items he can throw down can affect both Faust and his opponent, and consist of a Mini-Faust, a Bomb, a piece of Candy, and a Hammer. The Bomb can hit both Faust and his opponent, while the piece of Candy is used for a powerup and can be collected by both players. The other items that Faust possesses are purely offensive items, and can really mess up someone's flow when they want to attack. The hammer and the Mini-Fausts don't do a whole lot of damage, but they can interrupt anyone trying to dash in and it obviously leaves them open for an attack. Souten Enshin Rambu is an easy move to combo into, linking from Faust's S and HS attacks. The move also knocks down an opponent (although they can tech hit after) which gives him plenty of time to start filling the screen with random objects. He also has plenty of damaging moves from SER, including Going My Way? and his forward dash. Faust's Gamble Attack Overdrive is also one of the few Overdrive attacks that hits low, and can really mess up your opponent when used at the end of any string. Super What's Next? is definitely an Overdrive you should take advantage of at all times. The chaos that you can create with it is just too tempting to pass up. As far as rushdown goes, Faust has your basic attacks, but what makes him so powerful is his versatility. Faust has the most RC/FRC moves in the entire game. You can literally cancel every one of his moves if you feel that you're going to get punished because your opponent has blocked it. This makes Faust an incredibly dangerous character to take on because he can be so unpredictable." |
|


