|
|
Post by Tenshu on Jan 6, 2010 20:25:44 GMT -4
 May MayHeight: 158 cm Bloodtype: B Weight: 47 kg Birthplace: Japan (?) Birthday: May 5th (date adopted) Eye Color: Black Likes: Thinking about Johnny Important Things: Johnny Dislikes: Baldness After her reunion with Johnny at the last tournament, she lived in happiness. As his birthday drew near, the crew decided to get together and give him a present. However, to May, she wanted to give him a present not as "a member of the crew" but as "a single woman". Needing the money, she heard of the "bounty". But then, the target Dizzy had somehow been invited to join the crew by Johnny, and now May had a new friend, but... Mr. Dolphin! #1: Charge Away, Forward + S or HS (Can be False Roman Cancelled) Mr. Dolphin! #2: Charge Down, Up + S or HS (Can be False Roman Cancelled) Restive Rolling: DPF + S (Can be done in the air. Can be Roman Cancelled. Change direction by hitting the direction you want to go and then S) Applause for the Victim: HCF + P, K, S, or HS (Hold to Build Power. Can be False Roman Cancelled) Overhead Kiss: HCA + K (Throw. Can be Roman Cancelled) Overdrives:Ultimate Whiner (we could all probably think of various Schthack members from this name alone): HCF + HS (Can be Roman Cancelled) Great Yamada Attack: QCF x2 + S (Can be Roman Cancelled) Super Screaming Ultimate Spinning Whirlwind (SSUSW): HCF + S (Can be Roman Cancelled) - Deluxe Tile Bomber: P during SSUSW (Can be Roman Cancelled) Quoted from IGN:"May is a weird character in that she doesn't specialize in anything. Her Dolphin mixups are really good, since they seem to require a shorter charge than most moves. You can realistically follow up one Dolphin summon with another if you're fast enough. Mr. Dolphin #1 is a great pressure move that you should use at the end of most strings, whether they are blocked or not. May generally has enough time to recover from the Dolphin to block anything that comes out as a result of a counterattack. Mr. Dolphin #2 is actually very good for wakeup games and to stuff opponents who try to bust out a move right when they get up. Which leads us to May's throw, Overhead Kiss. This throw bounces your opponent off the opposite wall and towards you. You can follow up this throw with the Great Yamada Attack or with an air combo, depending on your tastes. Generally the Great Yamada Attack won't do as much damage as an air combo could because of damage scaling but either will work just fine. As for May's other two Overdrives, they don't pack as much of a punch as Great Yamada Attack, so it's best to stay away from them." |
|
|
|
Post by Tenshu on Jan 6, 2010 20:37:20 GMT -4
 Johnny JohnnyHeight: 184 cm Bloodtype: O Weight: 72 kg Birthplace: America Birthday: October 24th Eye Color: Blue Likes: Finding good women For Johnny, saving those in solitude, whether human or animal, is his duty. Even if that person is a Gear. And then, hearing about the Gear that did not want to hurt humans, Johnny set forth to offer his help once more. Upon arriving at the "Devil's Living Place", he found Dizzy, who had been defeated by Sol. Finding her solitude extreme, Johnny extends a helping hand, and invited her into his pirate force. Glitter is Gold: QCF + HS (Mist Finer becomes non-Recoverable) Bacchus Sigh: QCA + P (Mist Finer becomes unblockable) Mist Finer: QCF + P, K, or S (Can be Roman Cancelled. Hold to enter Kamae Stance) Divine Blade Transport (DBT): DPF + S (Can be False Roman Cancelled) - Divine Blade #1: S during DBT (Can be False Roman Cancelled) Divine Blade #2: QCF + S (In air. Can be False Roman Cancelled) Ensenga: HCF + HS (Can be Roman Cancelled) Overdrive:Johnny Special: HCA, Forward + HS (Can be Roman Cancelled) Quoted from IGN:"Calm, cool and all around badass, Johnny is one of the powerhouses in Guilty Gear X2. He may not have the speed of Chipp or the power of Potemkin, but his tools are second only to Faust in racking up the wins. His main courses of attack are with his Mist Finer combined with Glitter is Gold and Bacchus Sigh. The Glitter is Gold allows Johnny to make his Mist Finer move untechable if it connects, and if you happen to hit them with multiple coins, Johnny's Mist Finer is modified into a flashy multi-hit attack which is techable. However, Johnny has a limit to the number of coins he can throw out in each round, so you need to make sure that each coin hits. Bacchus Sigh is an odd-looking mist that modified the Mist Finer to become unblockable, but wears off after a couple of seconds. In Guilty Gear X he actually had a Mist Trap which allowed him to combine both Glitter is Gold and Bacchus Sigh so that Johnny would get the benefits of both moves. If you happen to try it in Guilty Gear X2, you'll find that your opponent can block the Mist Finer, despite them being surrounded with the Bacchus Sigh. However, this doesn't mean that Johnny has lost a step. You can still perform the Mist Trap, but it's slightly different than before. In GGX2's Mist Trap, you want to hit Glitter is Gold first so that any Mist Finer you happen to connect with will knock them down, preferably at close range. Once they have been knocked down, quickly dash over to them and activate Bacchus Sigh. They will recover right into the Mist and you can quickly hit another Mist Finer (which has now become unblockable) or you can save it until later. The only problem with this is that Bacchus Sigh will only last for a couple of seconds, so you'll have to act quickly. Luckily for you, Johnny's Mist Finer has some insane range and can hit from around half a screen away. Is the Mist Trap the trump card in Johnny's deck? Pretty much, but it's one hell of a setup. Other attacks to implement into your game is his Forward + HS, which can connect to his Johnny Special Overdrive for 50% of your opponent's life, is jump cancellable into Ensenga, and his Forward + P, which can setup an opponent for a free Mist Finer. Forward + P is especially useful if you've hit your opponent with multiple Gold is Glitter." |
|
|
|
Post by Tenshu on Jan 6, 2010 20:47:43 GMT -4
 Millia Rage Millia RageHeight: 169 cm Bloodtype: B Weight: 48 kg Birthplace: Russia Birthday: Orphaned so unknown Eye Color: Blue Likes: Chasing cats Important Things: Chastity Dislikes: Zato, fallen-out hair Finally, Millia gained peace and freedom. She lived her new life both as a person and as a woman. However, there was still some fear left in her heart. That was her thoughts of Zato. The "master" she had followed in the Organization was now a curse... and she lived with the fear that Zato may once again appear before her. These emotions created a complicated feeling within Millia. Finally, she resolved to defeat Zato, and set forth. Then, she learned that he had fallen to the shadows he himself summoned. Lust Shaker: Tap S or QCA + S and Tap S (Can be Roman Cancelled) High Speed Drop: QCF + K (In the air) Tandem Top #1: QCF + S Tandem Top #2: QCF + HS (Can be False Roman Cancelled) Bad Moon: QCF + P (In air. Can be Roman Cancelled) Forward Roll: QCA + K Iron Savior: QCA + P (Can be False Roman Cancelled) Secret Gardens: QCA + HS (Control with directions and hit HS) Silent Force: QCA + S (In air) Overdrives:Winger: QCA, HCF + HS (Can be Roman Cancelled) Emerald Rain: QCF x2 + S Quoted from IGN:"In an offensive-orientated game like GGX2, the faster you can attack, the better. Fortunately for Millia, she is by far the fastest character in the game, and her attacks are just as quick as her foot speed. Her best new move is her Hard Slash version of Tandem Top, which now has Millia perform the move with the actual disc coming out much later than usual. This is a great move to use for pressuring and baiting your opponent. Mix both Tandem Tops up together for a fun guessing game with your opponent. Another fun wakeup game is to execute a Tandem Top #2 and then if the attack hits, executing Millia's Emerald Rain Overdrive. Because the Tandem Top actually bounces your opponent off the opposing wall, the Emerald Rain will Millia's air attacks are also a lethal force in GGX2, providing her with tons of comboability for air combos as well as flexible options when faced in an anti-air situation. The best attack to get your opponent in the air is probably Millia's Down + HS, which will launch on hit. The good part about Down + HS is that it's highly comboable with other attacks, most notably Millia's standing S attacks. You can easily do a combo such as S, S, Down + HS, Winger Overdrive without much difficulty and do some good damage. Other options while in the air include air combos ending with Bad Moon or her air Dust attack. As for her other air moves, High Speed Drop is a great way of returning to the ground quickly in anticipation for anti-air resistance, although it does drop you at an angle that can still leave you vulnerable to an attack. Silent Force is a projectile attack that fires a single needle at your opponent. However you cannot use this more than once unless you actually pick up your projectile off the ground by crouching over it. It's a shame too, since the projectile itself is pretty good at interrupting attacks." |
|
|
|
Post by Tenshu on Jan 6, 2010 20:57:30 GMT -4
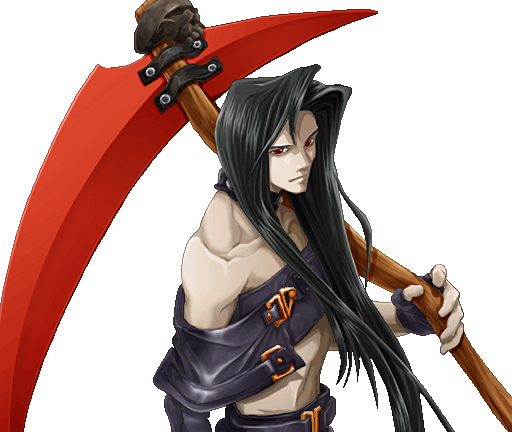 Testament TestamentHeight: 185 cm Bloodtype: Unable to determine Weight: 73 kg Birthplace: Switzerland Birthday: May 9th Eye Color: Red Likes: Thinking After regaining his own will after the death of Justice, he realized the things he had committed and despaired of living as a human. Living on without any purpose, the self-destructive Testament finally came to the "Devil's Living Place". There, he met Dizzy, who had separated herself from the world. Her story pulled at him strongly, and he became determined to protect her. Now that Dizzy has found her own place, what does Testament think? Phantom Soul: QCF + P or K Grave Digger: QCA + P (Can be done in the air. Can be Roman Cancelled) EXE Beast: HCF + S (Can be False Roman Cancelled) Warrant: QCA + K (Counter. Can be Roman Cancelled only if the counter hits.) Hitomi: QCA + S Zeinest: QCA + HS (Can be done in the air) Overdrives:Nghtmare Circular: HCA, Forward + HS Master of Puppets: QCF x2 + HS (Can be Roman Cancelled. Boosts power of Hitomi) Quoted from IGN:"Testament is a pretty complex character to use in that he does most of his damage based on his assisting attacks that complement his main attacks. Hitomi and Zeinest make up the backbone of Testament's attack, enabling him to set up elaborate traps all around the stage. Hitomi summons a poisonous tree onto the stage, while Zeinest summons a web that can ensnare opponents. Both moves are performed somewhat subtley, which makes figuring out where exactly these traps are very difficult. As with traps for other characters, the best times to lay down Testament's traps are when your opponent has been knocked down or at the end of a standard ground chain when your opponent isn't expecting it. Another good situation to lay down traps is when you have knocked your opponent away and they are in the middle of tech hitting. Both Hitomi and Zeinest are quick enough for you to summon at least once, twice if you're good. Phantom Soul is another one of Testament's assisting attacks. With this move Testament summons a flying skull onto the stage, and if it hits your opponent, they will be cursed for a period of time. During this time your opponent will be under attack from Testament's young lady friend and his pet raven at specific intervals. There are three different attacks that the Phantom Soul has, but unfortunately you cannot choose what attacks they are. However this is a great move to get on your opponent, but it requires a lot of work since the attack is extremely slow. Setting a web or getting your opponent hit with a powered-up Hitomi tree is a good start though, but remember that some characters can avoid the skull on wake-up, such as Ky and Sol who both have special moves that can duck under the skull. The last assist attack Testament has is the EXE Beast, which summons a purple monster called Barney to attack the opponent from behind. It's a fairly quick attack, but it's best used if your opponent is constantly running away from you. It also works fairly well when trying to direct your opponent into a web or a tree. Other notable attacks are Testament's Grave Digger, which is a fast and airborne attack that deals a good amount of damage, his Down + HS, which teleports him slightly forward and his Master of Puppets Overdrive, which powers up Hitomi so that it poisons the enemy on contact, and does not allow them to tech hit afterwards. A powered up Hitomi is a fantastic setup for Testament's other Overdrive, Nightmare Circular, which also poisons the enemy." |
|
|
|
Post by Tenshu on Jan 6, 2010 21:11:30 GMT -4
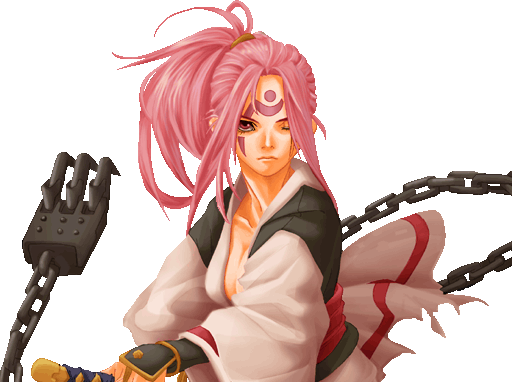 Baiken BaikenHeight: 162 cm Blood Type: B Weight: 45 kg Birthplace: Pre-destruction Japan Birthday: March 5 Eye Color: Peach Likes: Sake When Japan was under attack, Baiken witnessed her own parents and friends being burned to death in the flames. Their death was a result of Gears, but amidst the strongest flames there was a man. This man - encircled by flames and Gears - was studied by Baiken. At that moment, she felt a definite premonition. "This man is one to be defeated." Even now these memories drive Baiken forward, and she searches for "The Man" with murderous intent. Her travels continue. Tatami Gaeshi: QCF + K (Can be done in the air. Can be False Roman Cancelled) Youshijin: Reverse QCA + P while blocking (Can be Roman Cancelled) Mawarikomi: Reverse QCA + K while blocking Sakura: Reverse QCA + S while blocking (Can be Roman Cancelled) Suzuran: HCA + K (Can avoid High and Mid attacks) Yozansen: DPF + S (In air. Can be Roman Cancelled) Kabari: HCF + HS (Can be Roman Cancelled) Tetsuzansen: S during Kabari (Can be Roman Cancelled) Overdrives:Sanzu Watashi: QCF x2 + S (Can be Roman Cancelled) Baku KI: Back, HCA + P while blocking (Seals Jump from your opponent for 14 seconds. Can be Roman Cancelled) Baku RIN: Back, HCA + K while blocking (Seals Special Moves from your opponent for 14 seconds. Can be Roman Cancelled) Baku RYU: Back, HCA + S while blocking (Enemy offense power down for 14 seconds. Can be Roman Cancelled) Baku HOU: Back, HCA + HS while blocking (Enemy defense power down for 14 seconds. Can be Roman Cancelled) Quoted from IGN:"Make no mistake about it, Baiken's best move by far is her Tatami Gaeshi (or as some people would call it, the Doormat from Hell). There's just so many things you can use this move for that it has to be an essential weapon in any Baiken player's strategy. Not only can you pull this off in any situation, but you can also FRC it to contain and apply pressure onto your opponent! A good tactic for her Tatami Gaeshi is to sweep your opponent with Down + D and then link that into Tatami Gaeshi. This will pop up your opponent and you can follow them for a nice air combo. Speaking of air combos, you should always try to end all of them with Baiken's jumping Dust attack. It's a very powerful attack and can easily be linked with her jumping slash, another great aerial move. Using FRC with Tatami Gaeshi can also net you a free throw if your opponent is expecting you to simply continue your pressure tactics. Use a combo like P, S, HS, Tatami, FRC, Dash, Throw to catch them offguard and on their toes for the rest of the match. Make sure to take advantage of Baiken's Yozansen as well. As an air only attack, it doubles as an overhead and is useful for applying pressure on an opponent if you can master your instant air dash. A good pressure combo would be to use S, HS, Tatami, FRC, IAD, Yozansen. Finally Baiken's Sanzu Watashi is a great Overdrive move as far as damage and versatility goes, even if it's not the flashiest around. It's a three hit combo that can be cancelled at just about any point. Her Baku guard Overdrives won't be used as much as Sanzu Watashi, but they have their uses against opponents that are easy to read. Use Baku RIN against characters who are dependent on their special attacks to deal damage or to contain you, like Dizzy or Sol and use Baku KI for characters that need their air dashes for mobility, like Jam." |
|
|
|
Post by Tenshu on Jan 6, 2010 21:47:32 GMT -4
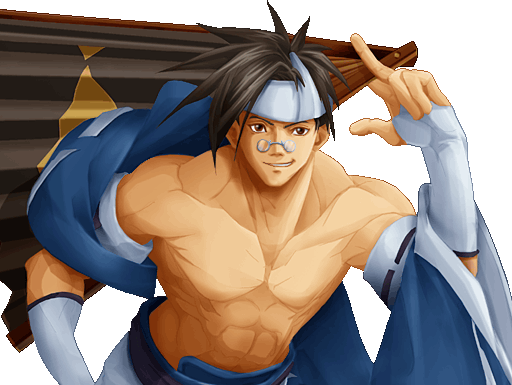 Anji Mito Anji MitoHeight: 183 cm Blood Type: B Weight: 68 kg Birthplace: Pre-destruction Japan Birthday: January 1st Eye Color: Black Likes: Active sports, travelling A decade ago, an unknown force destroyed Japan. This force was lead and created by "The Man". Anji has continued his journey to find "The Man". But, that journey is not born out of hatred and the desire for revenge. He simply had a goal to chase "The Man". Hiding his own race, Anji travels on today. In front of him lies only the unknown, shrouded in darkness. Shitsu: QCF + P Fuujin: QCF + S or HS (Can be Roman Cancelled) - Shin: Ichishiki: P after Fuujin - Hitoashitobi: K after Fuujin - Nagiha: S after Fuujin (Can be Roman Cancelled) - Shin:Nikishi Kou: P during Autoguard (Can be Roman Cancelled) On: DPF + HS (Only on airborne opponents. Can be False Roman Cancelled) Kai: QCA + P or K (Can be Roman Cancelled) Overdrives:Issei Ougi: Sai: HCA, Forward + HS (Can be False Roman Cancelled) Tenjinashi: Charge Down, Up + K (Can be Roman Cancelled) Kachoufuugetsu: HCA + S during Autoguard (Can be Roman Cancelled) Quoted from IGN:"While Anji isn't a top-level character by any stretch of the imagination, he does have some very cool moves that you can exploit. His Shitsu projectile is incredibly useful for locking down your opponent after you have knocked them down. A good tactic to use with Anji is to sweep them with Down + D and then followup with Shitsu. Most experienced players will be glad to eat the first hit of the Shitsu because the second part of the move is actually more dangerous, but new and/or inexperienced players will be at your mercy with this move. As as soon as the second projectile is about to hit, position yourself close to your opponent and make your opponent guess what you're going to do next. Throwing, using a super or another sweep are good options here. Anji also has some moves that perform autoguard. Autoguard is a very powerful tool for Anji because he has a total of five moves with autoguard properties (HS, far S, Down + H, Forward + K, Forward + HS). Follow up any autoguard opportunity with his Kou attack, but be wary of using it too much. Kou isn't invincible, and it can be beaten by certain moves that have higher priority." |
|
|
|
Post by Tenshu on Jan 6, 2010 22:19:16 GMT -4
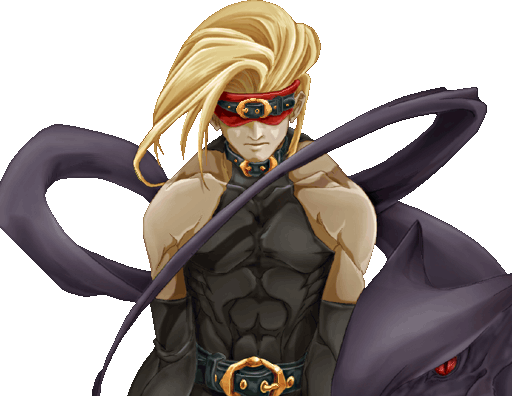 Zato-1/Eddie Zato-1/EddieHeight: 181 cm Bloodtype: A Weight: 68 kg Birthplace: Spain Birthday: January 28th Eye Color: Formerly Blue Likes: The language of flowers Eddie's use had been perfectly mastered by Zato, but with the weakening of Zato's body and mind, Eddie took over. However, Zato's body would soon be destroyed. In order to continue its life, the Eddie would need a new host. In order to continue its existence, Eddie sets forth again for the solitary battlefield. The time left is short... Invite Hell: Down x2 + S or HS (Can be False Roman Cancelled) Break the Law: QCA + Hold K (Release K to rise) Summon Eddie: QCF + P, K, S, or HS (Repeat to banish Eddie) - Tiny Attack: P (hold to delay) - Moving Attack: K (Hold to delay) - Anti-Air Attack: S (hold to delay) - Drill Special: HS (hold to delay) - Middle Attack: D (hold to delay) Drunkard Shade: QCA + S (Reflects projectiles. Can be Roman Cancelled) Damned Fangs: DPF + S (Throw) Shadow Gallery: HCF + S (In air. Can be False Roman Cancelled) Overdrives:Executor: QCF x2 + S (In air. Can be Roman Cancelled) Amorphous: HCA, Forward + HS Megalith Head: HCA, Forward + S (With Eddie summoned) Quoted from IGN:"Eddie is by far one of the most complex characters in GGX2 and is unlike any other lockdown character in the game. Eddie requires a ton of micromanagement on the player's part in order to be successful. The main aspect of Eddie's game is his lockdown with Mini-Eddie, which he can summon at any time. The problem with that is that once he has summoned Mini-Eddie to do his bidding, he loses the rest of his arsenal while he's out. There is another side effect to summoning Mini-Eddie. Once you do summon him, a little bar will appear under your name, indicating how long Eddie will be allowed to stay on the playing field before he disappears. Once Mini-Eddie is gone, the bar will slowly regenerate. Obviously this requires any Eddie user to carefully manage when Mini-Eddie is out. If you keep him out too long he won't be available for use until much later. It's a strict balance that you need to continually work with. The main attacks you'll want to utilize with Mini-Eddie is the Drill Special, Anti-Air attack and Moving Attack. The Drill Special is especially nice because of its delayed attack (on top of how long you want to delay it), but in general the Moving Attack is good for pressuring while the Anti-Air attack is obviously good for characters trying to jump over you and Mini-Eddie. Combine Mini-Eddie's attacks with your other special moves like Invite Hell to apply more pressure on your opponent. You can also try to scare your opponent into attacking by pressuring them, and then using Break The Law to get close enough to throw them with Damned Fang. In the end it's very difficult to explain exactly how to use Eddie because of his flexibility. He doesn't have any particular setups that can be used, and everyone is bound to play him differently." |
|
|
|
Post by Tenshu on Jan 6, 2010 22:41:51 GMT -4
 Dizzy DizzyHeight: 167 cm Bloodtype: Unable to determine Weight: 56 kg Birthplace: Unknown Birthday: Unknown Eye Color: Reddish-Brown Likes: Preening wings Having hidden away in the "Devil's Living Place", she was finally discovered by the humans, and was pursued. Being forced to defend herself, she nevertheless did not injure any of her pursuers severely, although this took much effort on her part. And then finally, the man who held the power of a Gear, Sol, defeated her. After that, the one who appeared before her was the leader of the pirates, Johnny. At the end of a long solitude, Dizzy has gained many warm friends. Flaming Spiral: QCF + S Arctic Impaler: QCF + HS (Can be False Roman Cancelled) Skull Crusher: DPA + S Hunger Strike: QCA + P, K, S, or HS Leave Me Alone!: QCA + P or K (In air) Overdrives:Imperial Ray: HCA, Forward + S (Can be False Roman Cancelled) Necro's Anger: Down/Forward, HCF, Away, Forward + P Gamma Ray: Forward, Away, Forward, HCF + HS (Requires Full Tension Gauge) Quoted from IGN:"Now that Dizzy is no longer the boss in the Guilty Gear series (that title goes to I-No), it seems that Sammy has toned her down considerably from Guilty Gear X2. Overall her damage has been decreased and her Hunger Strike projectiles have been modified. In Guilty Gear X one of Dizzy's Hunger Strikes would float around her and act as a shield. In GGX2 there are now two versions, one that rushes the opponent and starts attacking them and another that fires a red laser. Dizzy's primary combo of S, HS, Arctic Impaler has also gotten a downgrade as far as damage goes, not to mention that she lost her sweet triple jump. The upside is that the Arctic Impaler can be False Roman Cancelled, and her Forward + HS attack will almost always hit if you can FRC the Arctic Impaler properly. While it may seem all doom and gloom for Dizzy users, she can still be played in more or less the same way as in Guilty Gear X. The only real difference is that she deals less damage now. Her Overdrives while powerful are only useful in specific situations. Imperial Ray is a great tool to use if your opponent is right next to you. The Overdrive has no start-up time, so that means if someone is trying to act sneaky with their pokes the Imperial Ray will rock them. Necro's Anger is a surprisingly good move to use on wakeup. Dizzy lacks a real good attack for opponents who have been knocked down, but this fills in nicely despite its awkward motion. In other situations Dizzy is best left to use her Tension for False Roman Cancelling her Arctic Impaler." |
|
|
|
Post by Tenshu on Jan 6, 2010 23:22:23 GMT -4
 Bridget BridgetHeight: 158 cm Blood Type: O Weight: 50 kg Birthplace: England Birthday: October 26th Eye Color: Emerald Green Likes: Yoyos, Becoming more of a man, Naps As rumour has it, Bridget is actually the son of a wealthy aristocrat raised as a girl. Skilled at attacking opponents with his trusty yo-yo from up close or far away, distance is no barrier to him. Bridget fights to show his parents that he's no mama's boy and can make it on his own. Yoyo Extend (YE): HS (Can be done in the air, controllable by directions) - Recall: HS (Can be done in the air) - Roger Rush: QCF + HS - Jaggard Roger: QCA + HS - Roger Hug: DPF + HS - Roger Transport: QCA + K Kickstart My Heart: QCF + K (Can be Roman Cancelled) - Stop: P - Discharge: K (Can be Roman Cancelled) Starship: DPF + K (Can be done in the air. Can be False Roman Cancelled) Overdrives:Loop de Loop: HCA, Forward + S (Can be Roman Cancelled) Tragedy During Maintenance: HCF x2 + S Me and My Killing Machine: HCA, Forward + HS during YE Quoted from IGN:"Bridget is one of the new characters in Guilty Gear X2, and fits in perfectly with his style of lockdown involving his trusty yoyo. The yoyo can be used for several different purposes. You can leave it out on the stage and apply pressure to your opponent by forcing them to block whatever you're throwing out along with the yoyo from the opposite side. Another good tactic is to bait your opponent into following you past Bridget's yoyo and then nailing them once their character overlaps with the yoyo. Smart players will know that the yoyo is Bridget's primary means of attack and will do everything possible. Take advantage of some of Bridget's normal attacks like Forward + S, which goes at an upward angle and covers nearly half of the screen. It doesn't do a whole lot of damage, but for playing keepaway with your opponent there aren't many moves that are better. Kickstart My Heart might sound like a funny name for an attack, but it's actually quite useful in rushing down opponents. It's fast and while it doesn't do much damage, with two extensions off KMH (one low and one high) it creates a fun guessing game that can seriously mess with your opponent's mind. Bridget's best Overdrive attack is the Loop de Loop but don't forget about Me and My Killing Machine if you have Roger out and close to your opponent. Me and My Killing Machine adds a ton of guard block to your opponent's meter and is fairly long for an Overdrive. Getting back to the Loop de Loop, this is a terrific ender to any combo. A simple combo such as S, S, Forward + S, Loop de Loop will do almost 50% on your opponents. Quick and easy." |
|
|
|
Post by Tenshu on Jan 7, 2010 2:34:24 GMT -4
 I-No I-NoHeight: 165 cm Bloodtype: AB Weight: 46 kg Birthplace: Unknown Birthday: November 25th Eye Color: Changes depending on the angle Likes: Anything fun, Shiritori in jargon, being eager Important Things: Number one's a secret, guitar Marlene, youth Dislikes: People who don't have fun, milk A woman whose origins and motives are enigmas wrapped in mysteries. In command of a variety of aerial moves, I-No's air-to-surface rush attacks and aerial combat abilities overwhelm her opponents. Further, she's got an arsenal of "musical" moves, battling fearsome foes with her trusty "ax" in hand. (That's guitar, for all you dweebs out there!) Stroke the Big Tree #1: HCF + S (Can be Roman Cancelled) Stroke the Big Tree #2: HCF + HS (Can be False Roman Cancelled) Antidepressant Scale: QCA + P (Can be done in the air. Can be False Roman Cancelled. Can control yourself with the directions) Sultry Performance: QCF + P, K, S, or HS (In the air. Hold button to build power and delay. Can be Roman Cancelled) Chemical Love: HCA, Forward + K (Can be done in the air. Can be False Roman Cancelled) Overdrives:Longing Desperation: HCA, Forward + HS Ultimate Fortissimo: QCF, HCA + S (In the air) Quoted from IGN:"Considering how powerful Dizzy was in Guilty Gear X relative to how difficult she was to play, you'd think that any I-No player would have an easy time racking up the wins with her. Unfortunately that's not the case here. I-No can be a force to be reckoned with, but she takes a lot more dedication to play than Dizzy did in GGX. The first thing you'll notice with I-No is that she has a totally different dash than anyone else. She actually flies at a slightly acute angle, allowing her to use her Sultry Performance or her Ultimate Fortissimo Overdrive whenever she's moving forward. Her dash also gives her easy access to crossup attacks, which lets you attack your opponent while slightly behind them, positioning you deep inside their sprite for easy followups. I-No's best move is her Chemical Love, which can combos into pretty much any attack. It works excellently as a combo ender, but one thing you should keep in mind is that if your opponent is being hit by an attack while in a crouched position, a Chemical Love combo ender will not hit them at all. Chemical Love can also be used for other situations. The move is considered a projectile, so you can actually use it to negate other projectiles, and it has an insanely good range, reaching nearly the entire screen length. It's also the quickest projectile in the game, and has the ability to actually stuff other projectiles before they even come out. It's that fast! Another fun trick you can use with I-No is to knock down your opponent with an attack, launch her projectile (Antidepressant Scale) and direct it to go slightly down, and then dash behind it. Inexperienced players will try to block low, and you can attack them while you're still in the air, but those who can see this little trap coming will probably retaliate with an anti-air attack (such as Sol's Volcanic Viper). Finally, I-No's Stroke The Big Tree is a good move for one reason; it staggers. Not only that, but when it hits, you are placed so close to your opponent you can connect with I-No's Longing Desperation Overdrive for big damage. While the longer version of Stroke The Big Tree can be False Roman Cancelled, it's best to use I-No's tension for her supers." |
|


